Canvatorium Visio Introduction
The 5000 series of Labs for visionOS.
For those who are new here, Canvatorium is my experimental design lab for spatial computing. It’s a project that I use to share what I’m learning and building. I started the project in 2022 and revamped it in mid-2023. Most of the labs so far (0 series) were built in Babylon JS and WebXR.
I’m starting a new series of labs working with visionOS and AppleVisionPro. Labs in the 5000 series will use Xcode, SwiftUI, RealityKit, etc.
This project will be a bit different than the other series. For one, I can’t embed the labs on my website like I can with my WebGL based scenes. Instead, I’ll share updates with images, video, and code.
Project setup
I spent a few days last week setting up a basic project structure. Within this project I can create three types of labs.
- Windows – 2D visionOS windowed content with SwiftUI. I’ll explore what SwiftUI and RealityKit has to offer to make traditional 2D content more interactive and spatial.
- Volumes -3D models and simple scenes
- Immersive Spaces – Windows and Volumes can exist in the Shared Space (and in Immersive Spaces for a single app). When I need to explore a more complex 3D, AR, or VR idea I’ll use an immersive space.
I’ll admit, I’m a little rusty at SwiftUI. I built an app with it in 2019 and 2020, but haven’t kept up since then. Most of what I’ve done so far is pieced together from Apple developer docs and what I could remember. There is almost certainly a better way to do things…
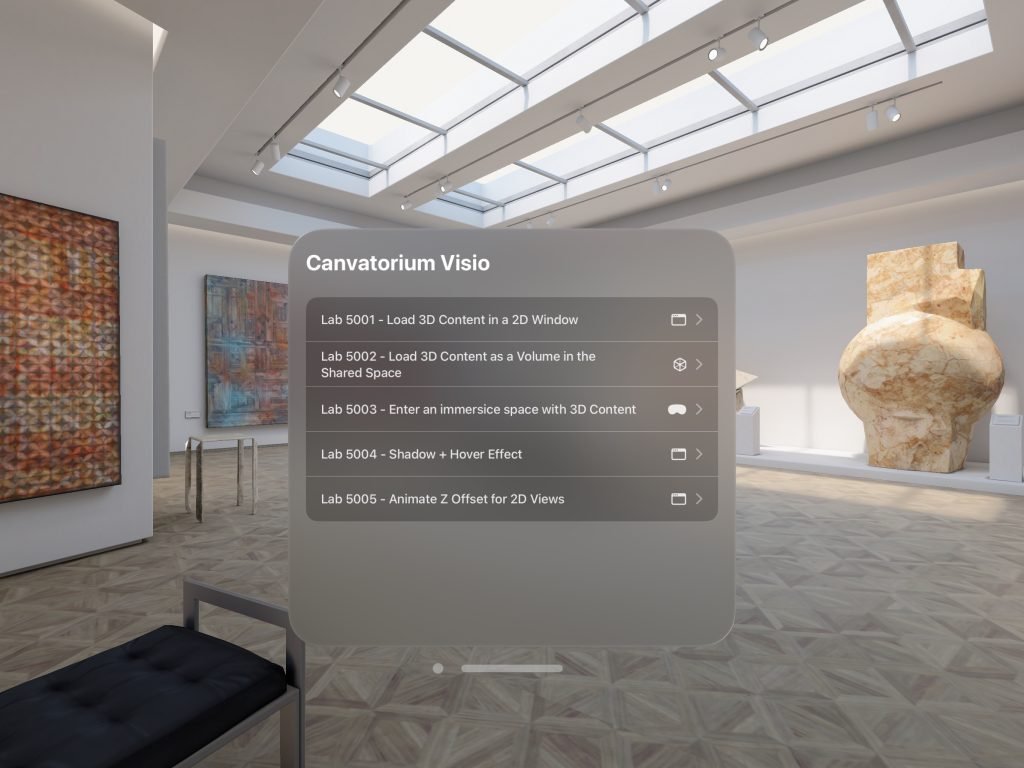
I wanted a single list of Labs, but I want to create three types of labs (see above). The way SwiftUI opens a new Window, Volume, and Immersive Space varies a bit.
I started with a very simple Router that can switch on an enum. Each Lab is contained in a SwiftUI View. This router will provide the correct view based on the route it is passed.
struct LabRouter: View {
    @Binding var route: RouterData?

    @ViewBuilder
    var body: some View {
        switch route {
        case .lab5001: Lab5001()
        case .lab5002: Lab5002()
        case .lab5003: Lab5003()
        case .lab5004: Lab5004()
        case .lab5005: Lab5005()

        case .none:
            Text("No route selected")
        }
    }
}
Then, at the App level, I create window groups for each lab type.
        WindowGroup(id: "RouterWindow", for: RouterData.self, content: { $route in
            LabRouter(route: $route)
        })
        .defaultSize(CGSize(width: 600, height: 400))

        WindowGroup(id: "RouterVolume", for: RouterData.self, content: { $route in
            LabRouter(route: $route)
        })
        .windowStyle(.volumetric)

        ImmersiveSpace(id: "RouterSpace", for: RouterData.self, content: { $route in
            LabRouter(route: $route)
        })
For Lab Data, I wanted a single place to update Lab titles, descriptions, etc. I created this data structure. In the future I may store this somewhere else, but for now it will do.
@Observable
class ModelData {
    var labData: [Lab] = [

        Lab(labKey: .lab5001, type: .view, date: Date("12/28/2023"), title: "Lab 5001",
            subtitle: "Load 3D Content in a 2D Window",
            description: "A new window with SwiftUI and RealityKit content.")

        ,Lab(labKey: .lab5002, type: .volume, date: Date("12/1/2023"), title: "Lab 5002",
             subtitle: "Load 3D Content as a Volume in the Shared Space",
             description: "A 3D Volume can be added to the shared space.")

        ,Lab(labKey: .lab5003, type: .space, date: Date("12/6/2023"), title: "Lab 5003",
             subtitle: "Enter an immersice space with 3D Content",
             description: "An immersive space that adds a green sphere in front of the user.")

        ,Lab(labKey: .lab5004, type: .view, date: Date("12/7/2023"), title: "Lab 5004",
             subtitle: "Shadow + Hover Effect",
             description: "Exploring what SwiftUI has to offer to add depth to 2D views in visionOS. The order of these modifiers is important. I used this order: hoverEffect > cornerRadius > shadow")

        ,Lab(labKey: .lab5005, type: .view, date: Date("12/7/2023"), title: "Lab 5005",
             subtitle: "Animate Z Offset for 2D Views",
             description: "Exploring what SwiftUI has to offer to add depth to 2D in visionOS. Three shapes in a ZStack with their offset adjusted via a toggle. We can go from a flat layout to one with views that pop out from the window.")

    ]
}
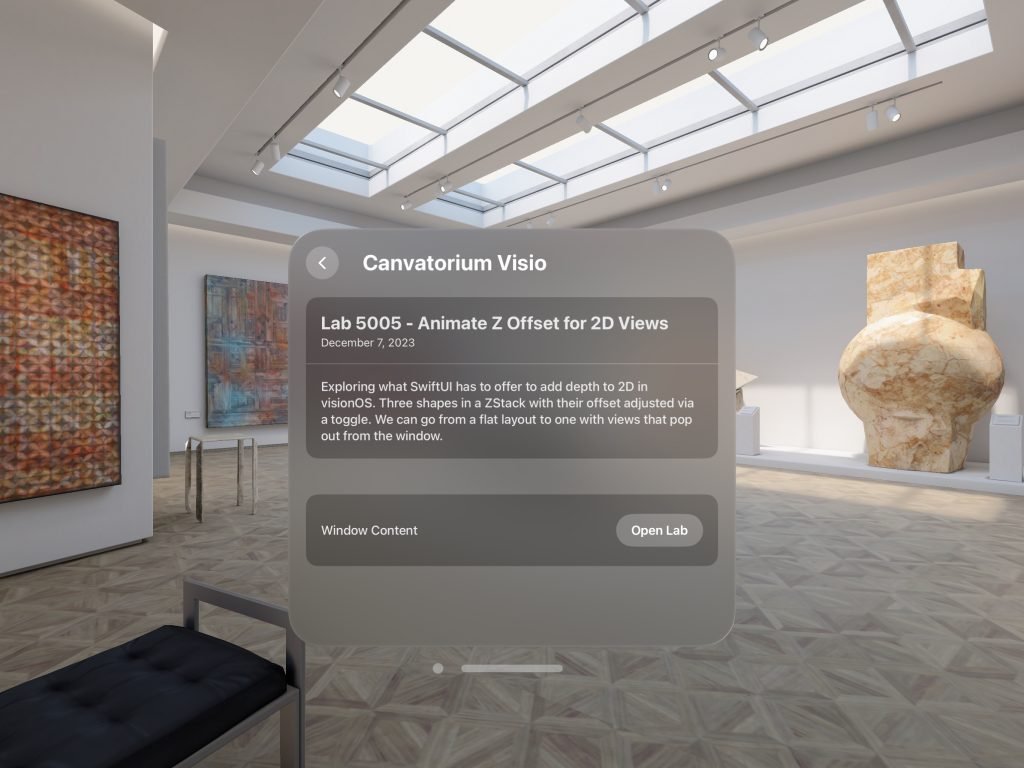
The main window provides a list of Labs derived from that data. Navigating to one will take the user to a detail view where they can read the lab notes and open the lab. Labs will either open as new windows/volumes or will enter an immersive space. For now, I’m keeping the main window open.


The detail view does the work of deciding how to open the lab based on its type. I wrote three helper functions to handle this.
    func handleWindow() {
        if(labIsOpen) {
            dismissWindow(id: "RouterWindow")
            labIsOpen = false
            showLabContent = false
        } else {
            openWindow(id: "RouterWindow", value: lab.labKey)
            labIsOpen = true
        }
    }

    func handleVolume() {
        if(labIsOpen) {
            dismissWindow(id: "RouterVolume")
            labIsOpen = false
            showLabContent = false
        } else {
            openWindow(id: "RouterVolume", value: lab.labKey)
            labIsOpen = true
        }
    }

    func handleSpace(newValue: Bool) async {
        if newValue {
            switch await openImmersiveSpace(id: "RouterSpace", value: lab.labKey) {
            case .opened:
                labIsOpen = true
            case .error, .userCancelled:
                fallthrough
            @unknown default:
                labIsOpen = false
                showLabContent = false
            }
        } else if labIsOpen {
            await dismissImmersiveSpace()
            labIsOpen = false
        }

    }
With this project structure in place, I can stop noodling on the project and get to work on the labs.

Will follow these labs. Thanks! Even this early organization post is helpful to new visionOS creators like me. Onward!
Thanks Dave!
We are all new visionOS creators learning this platform togeher.